from Jenyfur at asking if I would like to be a guest designer for Hero Arts Digital Showcase with Caardvarks. Well you can only imagine my excitement and I am here to say that I said YES!!!!! If you don’t know me I love Hero Arts and Caardvarks so I really racked my brain to do something special for this great honor. So I am delighted you are stopping by and a big thanks you all who visit my blog on a regular basis and a very special thanks to Jenyfur for this great opportunity!
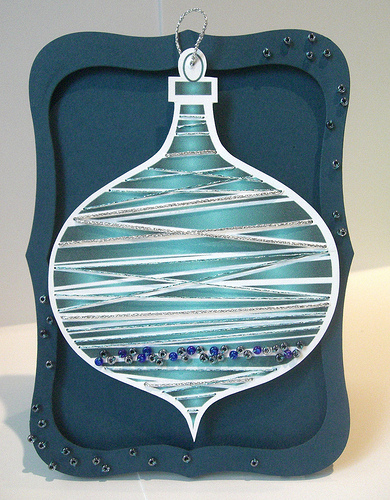
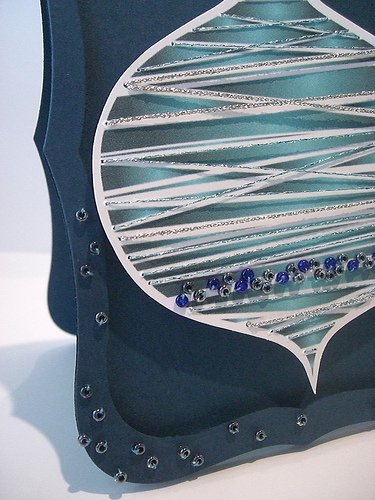
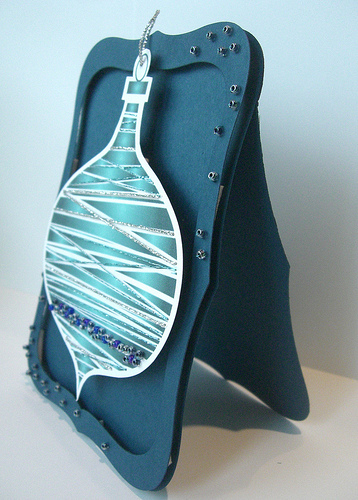
I loved working with Hero Arts DigiKit “Holiday Words and Ornaments” here . One of the things I LOVE about going hybrid is you can change the sizes of the digi “stamps” !!! I saved time on this ornament by not coloring or stamping, cleaning etc. so I could spend more time on the beading. To begin I downloaded the kit, chose the ornament with the geometric lines and changed the color to blue. I printed on white card stock and cut the image out leaving a boarder on the edge. For the beading I used some blue thread I had on hand and I didn’t worry about placement of the seed beads. The most important thing is to have the right size needle. I suggest you test the needle on several beads to see if they fit completely through the eye of needle otherwise it’s very frustrating! For the threading on the ornament I had some silver and blue metallic threads. I used a thicker needle and followed the lines in the digital ornament. When I placed the ornament on the card I put double pop dots on top of each other on the back so it’s raised over the boarder of the frame.
Supplies: Hero Arts “Holiday Words & Ornaments” seed beads, embroidery floss, metallic threads and sewing needles.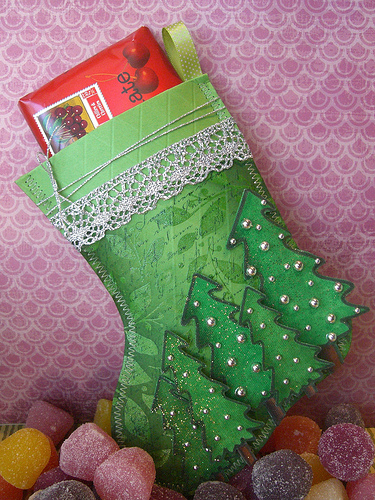
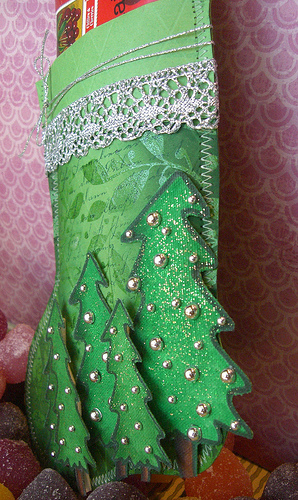
I also really enjoyed Hero Arts wonderful and creative “Scribble Trees” digikit here I really wanted to create some mini stockings for those special people in my life. I wanted to find a template that was quick and easy that I could pass on to you so I was delighted when I found Martha Stewart’s template here. If you making mini stockings do NOT enlarge the template. This way you can cut both sides of your stocking on a single 8.5 x 11 sheet of paper. (finished stocking size is 7x7x4)
Details on the stocking:
I printed M.S. template on “printer” paper to make my template, traced it on card stock and cut out. (I trimmed the sewing margins just a tiny bit.) After cutting out both sides of the stocking I put one aside because I had no interest in decorating the back. I stamped the green paper with Hero Arts stamps in distress ink and embossed the branch stamp in clear and then distressed with a heavy hand. I scored the paper every half inch and then rotated the paper to create a diamond patter. Fold down the cuff and choose your ribbon for the hanger.(This is a good time to start on your trees so they have time to dry …while you are waiting for them to dry you can do your sewing) Make a sandwich between the ribbon loop with both sides of your stocking. I use paper clips to hold my two sides of the stocking in place while sewing. You will be sewing your loop into the stocking. If you choose you can go over the stitching with a light marker to add color so the stitches are more subtle and not so bright white.
Supplies for stocking: Hero Arts “Old Lettering Writing”S4878, “Branch Background” CG122, green cardstock, embellishments ,Ranger Peeled Paint & Pine distress inks, Copic Markers, Stickles Lime Green.
Details for the scribble trees on the green stocking:
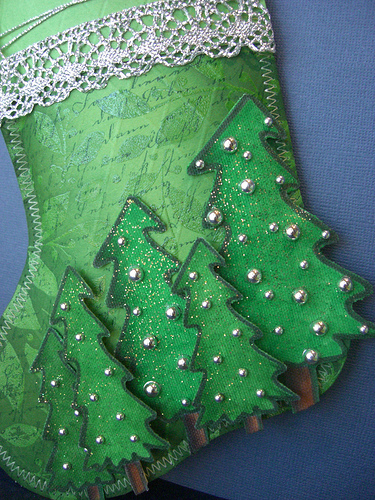
I downloaded the trees & selected this particular tree to work with. I played with the sizes of trees I desired in “Word” then printed them in different sizes and heights on Claudine Hellmuth’s “Sticky Back Canvas” (do a test first of your sizes first) I have the 8.5×11 sheets so they just slide right into your printer. After cutting out the trees I colored them with Copic markers (you can use distress inks too) and outlined the edges so you don’t see ANY white. Then I covered all the trees with Stickles and while waiting to dry I did my sewing. Once dry I DID NOT remove the backing (from the Claudine’s Sticky back canvas) from the trees. I glued down 3 trees and popdotted the last two. Apply your embellishments and ribbon and stand back to admire your work.
Supplies for scribble trees: Claudine Hellmuth’s “Sticky Back Canvas”, Copic markers, metal accents by Mark Richards and Crystal Sticker Elements, Lime Green Stickles.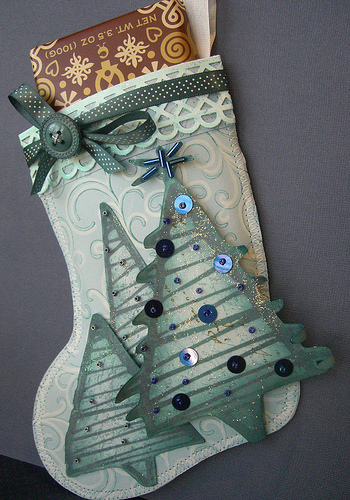
This blue mini stocking was created from the same DigiKit from Hero Arts as the green one above this but, here it is again and here is Martha Stewart’s template again.
Details on the blue stocking:
I printed Martha Stewart template on “printer” paper to make my template, traced it on card stock, cut out. (I trimmed the sewing margins just a tiny bit.) After cutting out both sides of the stocking I put one aside because I had no interest in decorating the back. Then I stamped with Hero Arts Flourish Background in Broken China Distress Ink and I added white details with a Glaxy white marker for a shadow effect. Now you are ready to fold down the cuff and choose your ribbon for the hanger. (this is a good time to start on your trees so they have time to dry …while you are waiting for the trees to dry you can do your sewing) Make a sandwich between the ribbon loop with both sides of your stocking. I use paper clips to hold my two sides of the stocking in place while sewing. You will be sewing your loop into the stocking.
Supplies for this stocking: Hero Arts “Flourish Background” CG119, card stock, embellishments and a boarder punch. This particular punch new from Martha Stewart. PapertreyInk ribbon and button, Broken China distress ink by Ranger, Galazy White Marker.
Details for the scribble trees:
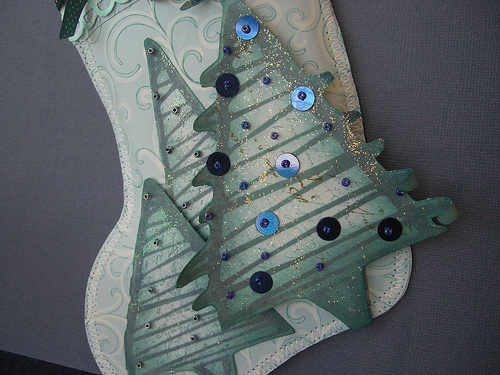
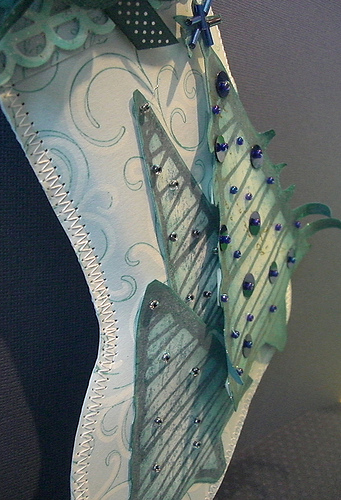
I downloaded the trees & selected this particular tree to work with. I created the tree image to different sizes that I desired in “Word” and changed the color of the trees to a blue grey then, I printed them on a white card stock and cut out (notice I cut off some of the lines that extend off the tree all except for the focal tree). I distressed the trees in Broken China and Faded Jeans. When distressing try to keep the center lighter than the permitter of the image. I stamped the trees with Hero Arts Old Letter Writing in Broken China and for the biggest tree I added some Walnut distress ink (just a little on the stamp). I used a blob of Stickles and rubbed it into my trees with my finger and set aside to dry. (while drying this is a good time to do your sewing). Now it’s time to decide how you want to decorate the trees. I sewed down some seed beads with some blue thread I had on hand and added sequins with seed beads on top of the sequins for the largest tree. (It really didn’t take as long as you might think.) Most important is to have the right size needle to fit though the seed beads. Test before trying otherwise it’s very frustrating! Glue down the secondary trees first and then popdot your focal tree. Apply your embellishments and ribbon on the cuff and stand back to admire your work.
Supplies for the scribble trees: Hero Arts “Old Letter Writing” S4878, Faded Jeans and Broken China distress ink, Waterfall Blue Stickles, Seed beads and Sequins, Bugle Beads for the star, card stock, thread and needle. 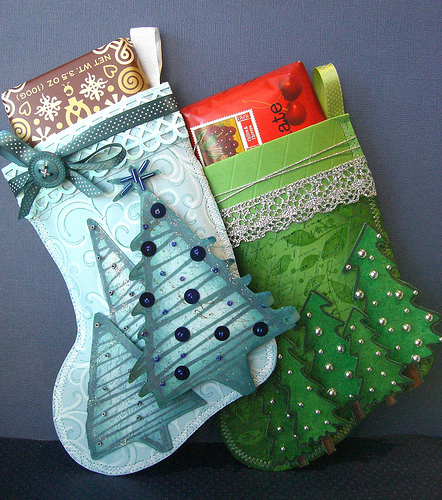
THANKS AGAIN FOR GIVING ME THIS OPPORTUNITY TO SHARE ! Hugs,Kathy
 giving thanks
 A few more cards for Jennifer McGuire’s card drive
 first post
AAAAAAAAAAAAHHHHHHHHHHHHHHHHH!!! You ROCK!!!
Jane’s comment says it all. I am screaming inside (as hubby is still asleep). Kathy – you are INCREDIBLE!!!!!!!!!!!!!!!!!!!!
THUMP! Okay….that was me, fainting. And now I’m dizzy!
Kathy…..i have no words. No words. Just in awe. Total awe….
OMG….Unbelievable….You are AMAZING!!!!
OMG your projects are amazing, i love all of them. Congratulations Kathy you rock
just amazing!!!!! I am in awe and speechless!!!!!!!!!!!!!!!!!!!!! those projects are so creative!! fabulous!! love them all!!!!!!!!!!!!
Well you knocked it right out of the park! Beautiful… Lovely… etc. etc. etc… Fantastic projects and yeah for you!
Spectacular projects, Kathy! I especially love the blues you used on the card and the stocking. Congrats on the Guest Designer spot – well deserved!
YOU are the best! The best! xoxo
Holy Toledo!!!!! These are just awesome Kathy! Your details, your instructions your close up photos! OMgoodness!! Gorgeous gorgeous gorgeous!
Congratulations!
I have this post bookmarked! HOT projects:)
WOW! These are gorgeous! All the things you did with those digital kits, really wonderful!
These are amazing!!! I have hopped over to your blog on other occassions and have been really impressed with your beautiful work!
Congratulations, Kathy! All of these are wonderful!!
These are absolutely stunning Kathy, your attention to detail is second to none. I absolutely love these!!!!!!!!
GORGEOUS….everyone of them!!!!!!! The DETAILS you think of are absolutely OUTSTANDING!!!!
beautiful!! thank you for using my Sticky Back! I’m oing to do ablog post and I’ll link to this!!
Did you see Claudia Hellmuth just “dropped by”????? OMG! You are going to places, Kathy! All the projects are simply SPECTACULAR!!!!!!!!!!
Love this! I thought the trees weren’t paper–thanks for the info. I’m pretty sure I can’t recreate it even step-by-step, but would love to know the colors of the copics you used on the bright green trees.
Really gorgeous!
Beautiful! I may have to CASE this!!
Kathy– These are ALL simply gorgeous! I love all of the details you add to your hybrid cards! The beads look great and I love your colors, too!! AMAZING- AMAZING- AMAZING!!! 🙂 Congrats on being the guest designer- an honor which is well-deserved!
Amazing projects Kathy! Your creativity is limitless!
Oh my Kathy, they are sooooo adorable. Love the way you have embellished them and your colouring/stamping techniques are awesome. So glad I’ve found your beautiful blog:-))
Wow, Kathy, This is too cute!!
I like the way you sew the beads and how you decorate the stocking. Good holiday gift idea.
Congrats Kathy!!!!! Your work is fantastic!!!! Love every single detail of the stockings! and Thanks for stopping by my blog!!!!
Congratulations!
Well deserved – loved what you shared with us today … well everyday!
Sandra
These are gorgeous! The details you think of are just amazing! LOVE the beads! Congrats on being the guest designer. So happy for you!
Wow, amazing!!! Congratulations!! You are over all places! And Claudine Hellmuth!!! You rock, Kathy Baby!
Hugs,
Vanessa
Kathy – these are just the most amazing things I’ve seen is ages!!!! I can’t believe you make them sounds so simple to make but OMG – I’m so impressed on how they turned out. Your are so talented no wonder you got asked to be a guest designer!!! GO GIRL!!!!
Oh my, these are fantastic, Kathy…WOW!!!!
WOW I’m speechless, Kathy!! You totally ROCK, you are just amazingly talented!! Love love love your work!