Hello Friends, Welcome to another big post! This card was inspired by two of Penny Black designers that have been with PB for years and they both are so talented! I really encourage to you to visit their blogs if you haven’t already! Here is Elizabeth Allen’s BLOG and Angela Kennedy’s BLOG. Angela is giving away one of her amazing pieces of art right now to one lucky blog reader.
All week Penny Black is bringing you tutorials with techniques on their blog. If you missed Monday and Tuesday’s I think you will want to make sure to see them. I would LOVE it if you could pop over. Here is the link 🙂 Have you seen Penny Black’s new web page? They are giving a sneak peek for their NEW CATALOG and it’s to die for!! Check it out here!!
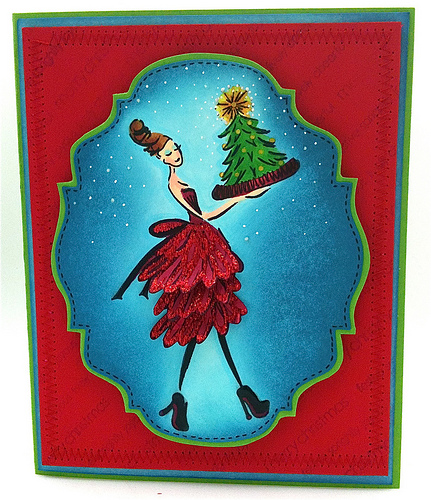
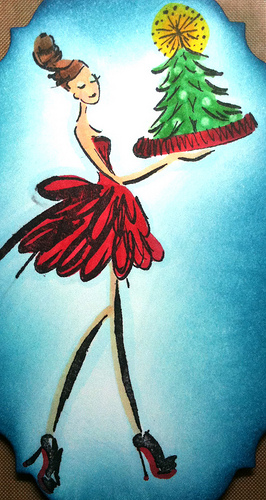
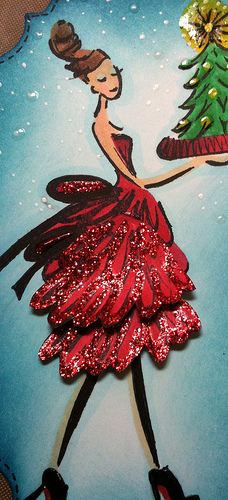
Today I am sharing this technique on the blog at PBl. I want to show you how to create backgrounds easily with lots of depth. So grab your drink of choice and hang with me for a minute.You will also see how to create this layered skirt. The original stamp has ONE skirt.
Before we get started here is the inside.

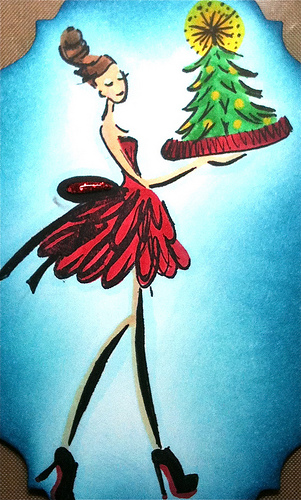
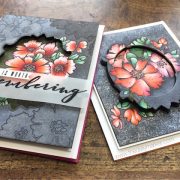
Opps and I wanted to show you one more card with the same background giving you a different perspective. 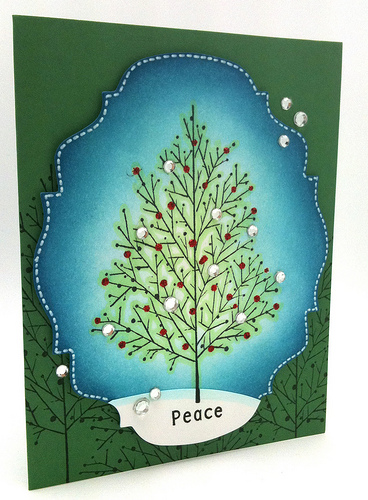
I traced around the branches with any green marker. Add some stickles and bling and you are finished. For the background on the card base I stamped the same tree for a quick and easy card. It just gave it a little interest.

Once your image is stamped in memento ink you want add your background shading. For this I used a Copic maker Booo. I put the tip almost next to the black outline and flicked the color away from the line sort of like you are sweeping with a broom. You lay the broom down then push away lifting up the tip. (you could use a light blue pencil or watercolors)
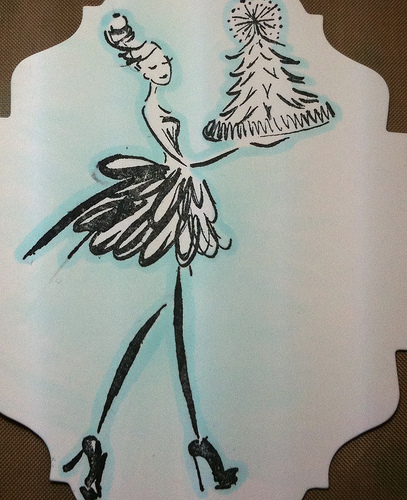
Then you want to take the next color ( I used B000 or BOO)
All you do is trace around the image.
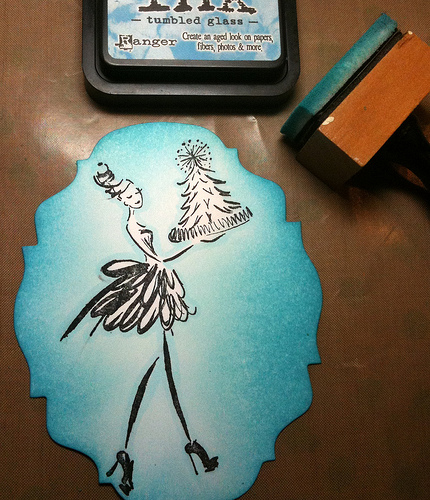
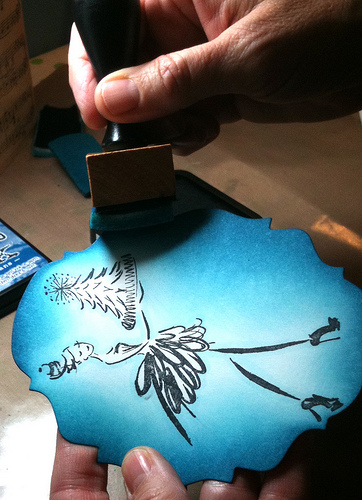
Distress the card base with tumbled glass distress ink. To apply use circular motions beginning with your distress tool on the craft mat. While using the circular motion continue pulling the distressing tool towards the center of the paper. Leave a little bit of the middle white.

Now you want to do the same thing with broken china. When you are bringing the ink towards the center bring it not as far in as you did with the tumbled glass.
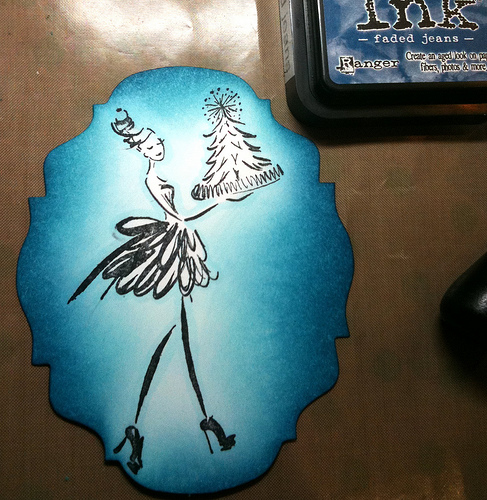
Repeat with faded jeans but, don’t pull the color as far into the center. Wait for the ink to dry or use a heat gun that you use for embossing.
Once dry add some faded jeans ink to the edges only. This time pick your paper off the mat and use the tool on the edges only. This is the final result. Your eye is naturally drawn to the center because it’s lighter in color. Maker sure you are using FOAM and not felt on your distressing tool.
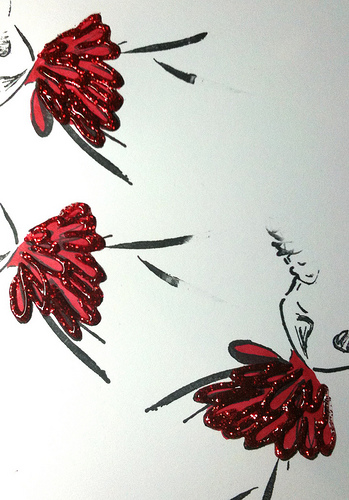
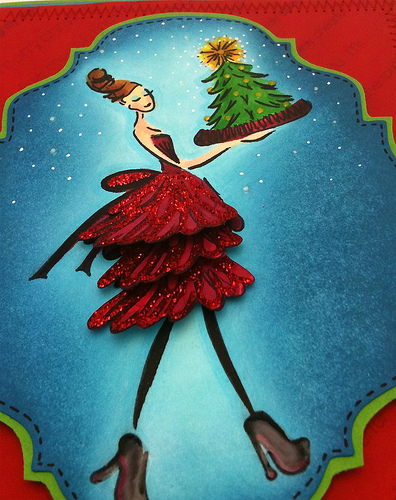
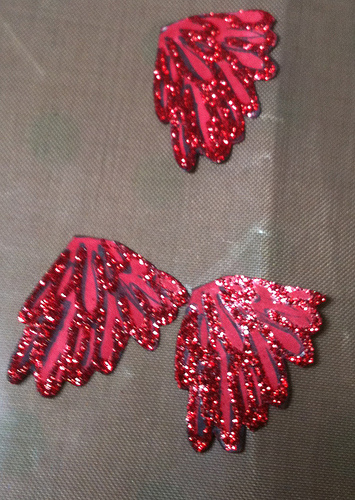
To create the layered skirt all you need to is stamp the skirt three times in memento ink.
Color with any red marker and add stickles using the black lines as your guide.
Before starting with the stickles you want to turn your bottle upside down and let all of the glitter float to the tip. When you open top squeeze the glitter on some scrap paper to make sure there isn’t any air bubbles. Follow the lines of the skirt squeezing the bottle evenly and slowly while tracing the black lines in the skirt. Set aside to dry for a few hours.

Color your image with any markers. See the smudge on the left by the bow you won’t see it later.
If you use Copics on the tree take your colorless blender to remove some of the color for lights on the tree. I also added red soles on the shoes as see in the photo below.
Now here are a few things that I like to do on my cards but, it’s not necessary at all. I traced over the image with a fine tip black marker. You might notice I really outlined the bow on the dress and colored in the shoes. I also added a different yellow to the center circle of the star , and yellow to the “lights” on the tree.
Add some stickles inside the bow. 
Again here are some more details to add but, not necessary. Add white dots to your card base and be sure to add a few on that smudge. Add glossy accents to the shoes, lights and star on the tree, and on some of the white dots. Faux stitching adds that little extra to this card.
Check to see if your glittery skirts are dry. Cut them out and take a marker along the edge of the skirts so you don’t see any white paper edge. (make sure you leave as much of the top of the skirt as possible when you are cutting them out)
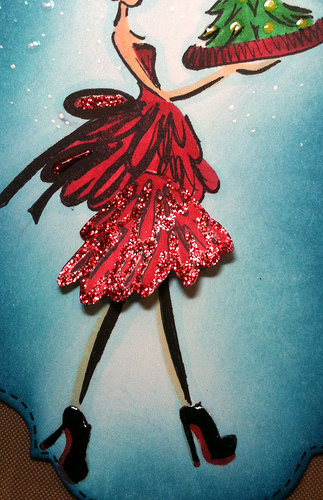
Before gluing bend the bottom of the skirt up a little (you will do this on all layers). Save your best skirt for the top and glue the bottom of the skirt first. This photos shows the random glossy accents on the white dots and on the lights on the tree.
Place your second skirt on the image and then your last skirt. Layer your card and you are finished!
Walla!! Oh goodness thanks for reading this post all the way to the end. This definitely took some time and I hope it was helpful. Don’t forget that Penny Black will have a technique for you everyday this week. I’ll be back tomorrow with 5 more cards!! Thanks soooo much for your support! Hugs,Kathy
Supplies: ( just click on the link for more details.)
|
|
|
|
|
|
|
|
|
|
|
|
|
|
|
|
|
|
|
|
|
|
|
 Altenew Crafty Friends Blog Hop + Giveaway
 hungry hippo
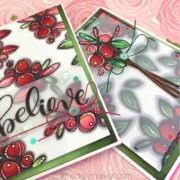 Vellum Yes please & blog hop


Lovely cards and great Technique Kathy. Thanks for the step by step.
Wow loved this little tutorial, you would be amazed at how much I learned!! One question and I am sure everyone knows the answer except me but why foam instead of felt? Love how you made her dress longer too.
Pinky
Hiya Kathy
thanks for the tutorial I will hop over and see more too, this is just gorgeous, I love how you get such a great colour intensity!
Joey.xx
Great tutorial Kathy… awesome card and you make the background look sooo easy!!!!
What an awesome tutorial, Kathy! Thank you so much for spending time to write it all down, step by step!
I actually think that the girl looks so much better in the longer dress! :))))
It is quite simply splendid!
That makes one moment that I pass on this blog without leaving comments, I launch out today.
Why? Because me and English it is not too buddy buddy, therefore I am obliged to use a translator.
I hope that this one will not say too many bétises, will not deform too my message starting.
In any case I take full the eyes of them when I come here!
North winds, has very soon here or on my blog!
Thanks for the tutorial Kathy… your extras really make your cards distinctive and stand out!
Hi Kathy
I commented on the PB site but wanted to say something here too. Your work is fabulous, thank you for a fab tutorial.
Hugs Ali x
Gorgeous card. Thank you so much for the technique.
This cards totally fabulous, kathy..Wow!! Thanks for the great totorial!
Absoutely GORGEOUS and FABULOUS tutorial Kathy!! LOVE the special details you put into your cards….truly BRILLIANT in everyway!!!!
Wow! Gorgeous dress! So creative!
Such a fantastic card, I just am in ore of how you created the skirt on the dress, fantastic my friend, I love it and what another beautiful card that you shared with us in a Christmas tree, love your talent.
fantastic, Kathy!
Can I come live with you?! (Hee, hee)
Seriously, this card is so amazing, Kathy! You always add those fabulous finishing touches that make your cards so special! This one in particular is fantastic! I ADORE that skirt! So creative! Can ya just send a teeny bit of your talented brain my way please! And I really love when you show us tutorials! I know how long it takes to do that and it is so appreciated! Big hugs to you, my talented friend! 🙂
Takes my breath away — incredible
Wow Kathy! This card is a knockout! Thanks for the step by step….. I think i might could do this 🙂
Thank you so much for doing this tutorial. This is one technique I am going to have to try. I love the colour on your background – just amazing. What a gorgeous card Kathy 😀 xoxoxoxoxo
Oh my! What a wonderful tutorial x 2!!! Love both cards! Gorgeous details to the dress…
GREAT tutorial; your work always leaves me speechless!!
Magnificent cards and tutorials, kathy. Thank you for taking the time to produce such clear instructions and photographs. I am off to PB now. :o)
really lovely image and cant wait to try this technique, thanks for the demo.
k
x
Ahem, I couldn’t even attempt to be as wonderful as you…wow…. that is some step by step. I adored reading all about your technique – thanks for the wonderful inspiration. You are amazing. Off to PB now.
Wow Kathy – this is breathtaking! You take everything wonderful and make it better! I just LOVE it!!! TFS!
Wow Kathy what an amazing card and fabulous step by step, thanks so much, loved reading every bit of this, would love to try your background technique!!
WOWZA.. Stunning..Your coloring is always so brilliant.. Thanks for the step by step. The pieced dress looks fab!!
Great color combination!! The card is stunning!!! The one i luved is her BLUE eyeshadow!! Very detailed touch! 🙂 I luv the inside of the card too!
WOW! This card is stunning. And gorgeous. You put so much work into it and it is PERFECT!
Thanks for showing all the steps.
Absolutely beautiful cards, Kathy! Seeing all the steps laid out this way really helps show just how much work goes into each of your amazing cards! Thank you for this terrific tutorial!
The words in english miss me to say how much I find your card beautiful and so creative. Thank you to share this creative “how to”.
Hugs
awesome technique, I look forward to trying it myself!
I love reading your posts, I learn so much! Your work is always so beautiful
I have been searching for a tutorial on making these cards and I fell on your blog via InLinkz… So glad I registered over there today!
Your tute is very clear to understand! Thanks so much for taking the time to upload it!
Gorgeous! I love that sparkle on her dress!!!!!!! I’ll be thinking of this card all night! 🙂
Love that tree too!
Oh my goodness…my little head is simply spinning! I can’t believe the layers of gorgeous magical accents you added to this incredible card! Such a masterpiece!
blessings to you my uber talented friend!
Oeh, I really loved reading about how you make backgrounds!!! And it’s so lovely and bright, I should really give it a try!! For sure!! I love your card!
Hugs, Wendy
Hi Kathy! As promised, headed right over to see your post today, ans it did not disappoint!! You combined my new love of Distress Inks, with those ever intriguing Copics- I’m hooked!!! I am in love with how you worked with that stamp to make the skirt longer, it’s waay better that way and is just beautiful with all the Stickles, yum!
Very cool cards! Love how you popped the skirt on the first! And I love the glitter! 🙂
Wow! This card is amazing! Thanks for the tutorial Kathy – it was awesome 🙂
Oh this is so stunning and your tutorial is brilliant and very detailed. So love what you did wit the skirt.
These are stunning! I love what you did with the dress and those backgrounds are beautiful! Thanks for sharing!
Love this card! Thanks for the tutorial.
a.m.a.z.i.n.g. work girl, amazing! stunning cards. LOVE them!
STUNNING.. thanks for sharing how you did the background….
thank you for all of the info on how you did this!!! i am completely in awe of this card….just…jaw dropping gorgeousness!!!!
thanks for sharing!!
hugs!
meredith
(JAW DROPS OPEN)….this is beautiful!! I love all your details and the skirt idea…wow!
you have inspired me to get back to my table after a very sad week…..thank you!!!!
xx-Kristyn
http://www.goodgravycrafts.com
wow, what a great tutorial and gorgeous card!
Thanks, Kathy, for the stunning card and beautifully clear instructions! x
The shading on that card is spectactualar!! Thanks for showing us the technique. I can’t wait to try it….after I clean up my studio :)!
Lori
This is fantastic. I especially like how you have done the dress very creative and very effective. Thanks for sharing. hugs Ali x
Kathy, this tutorial is amazing! Thank you so much for sharing it with us!
It’s nice when people outline the details in their projects because it really is all about the details! I love the way you’ve layered the skirt and the inking on the background. Beautiful!!
wow. i learned so much from this tutorial. thanks for taking the time to post it!
Thanks for sharing this technique! Fabulous!
Kathy, these cards are amazing! I love the vibrant colors and that background…oh my! Thanks for sharing your technique, I will be trying this very soon ;D Hugz, Cheryl
Kathy, thanks so very much for the tutorial which I only found recently as a friend was telling me about it. I love it and I think I need a bit of practice but its a good first attempt! thanks again and I have linked back to your blog post.. hugs Jess xx
Wow this is fantastic Kathy, thank you for sharing. Love the layered skirt. Hugs xx
This is simply WOW!! The way you changed that simple dress to an evening gown is simply awesome! Thanks for the tutorial! I love how patiently you dress up your card!
Wow! What a fabulous card and a great technique. I love the layered look! TFS