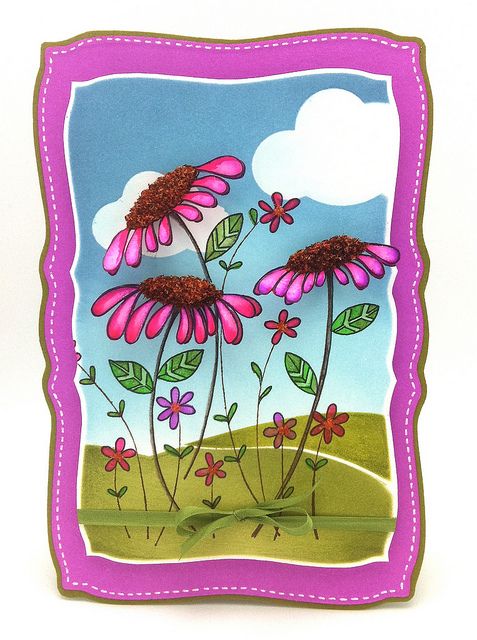
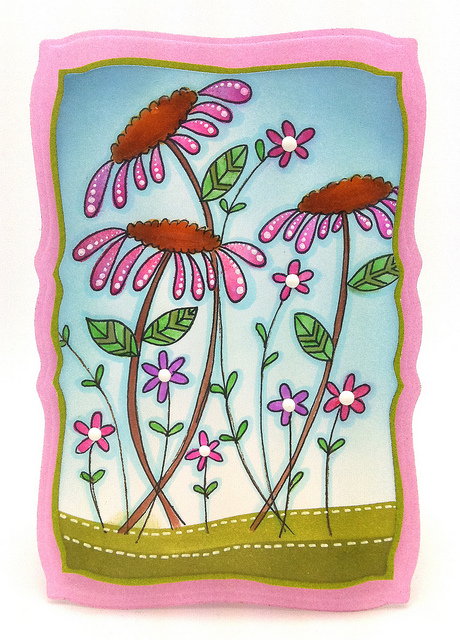
Hello Friends, I have to thank you all for voting on your top two favorite Penny Black Flowers in this post. “Star Inspired” & “Flowers Amongst Flowers” (below) were your top two picks. This week it’s my turn on the Penny Black blog so I like to try and give you something to sink your teeth into. Today I will show you how to create this background with distress inks and give you a bonus card.
Before we get started I would like to congratulate Christy. I have a “Star Inspired” just for you.

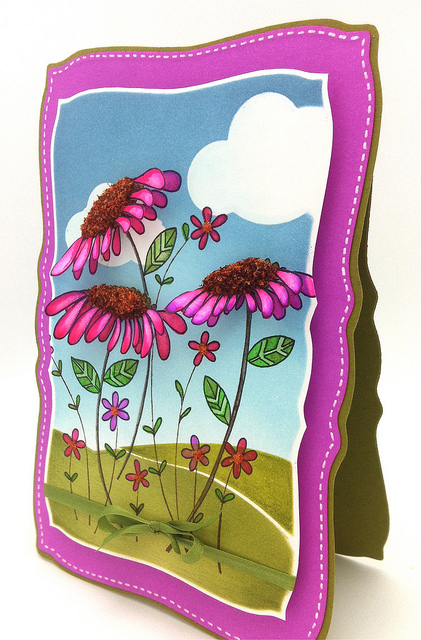
I was happy with my card but, something was missing so I decided to stamp three more flowers and cut them out. Finally I can link you to my magic scissors that make all of my tiny cutting possible.

When you are “cutting” your paper layer the card stock & a sheet of scrap copy paper (it’s thinner). After your papers are cut it’s important to tape the back of your paper to the Spellbinders die to hold it secure. I like to use drafting dots because they lift up easily.
Turn your die onto the front.

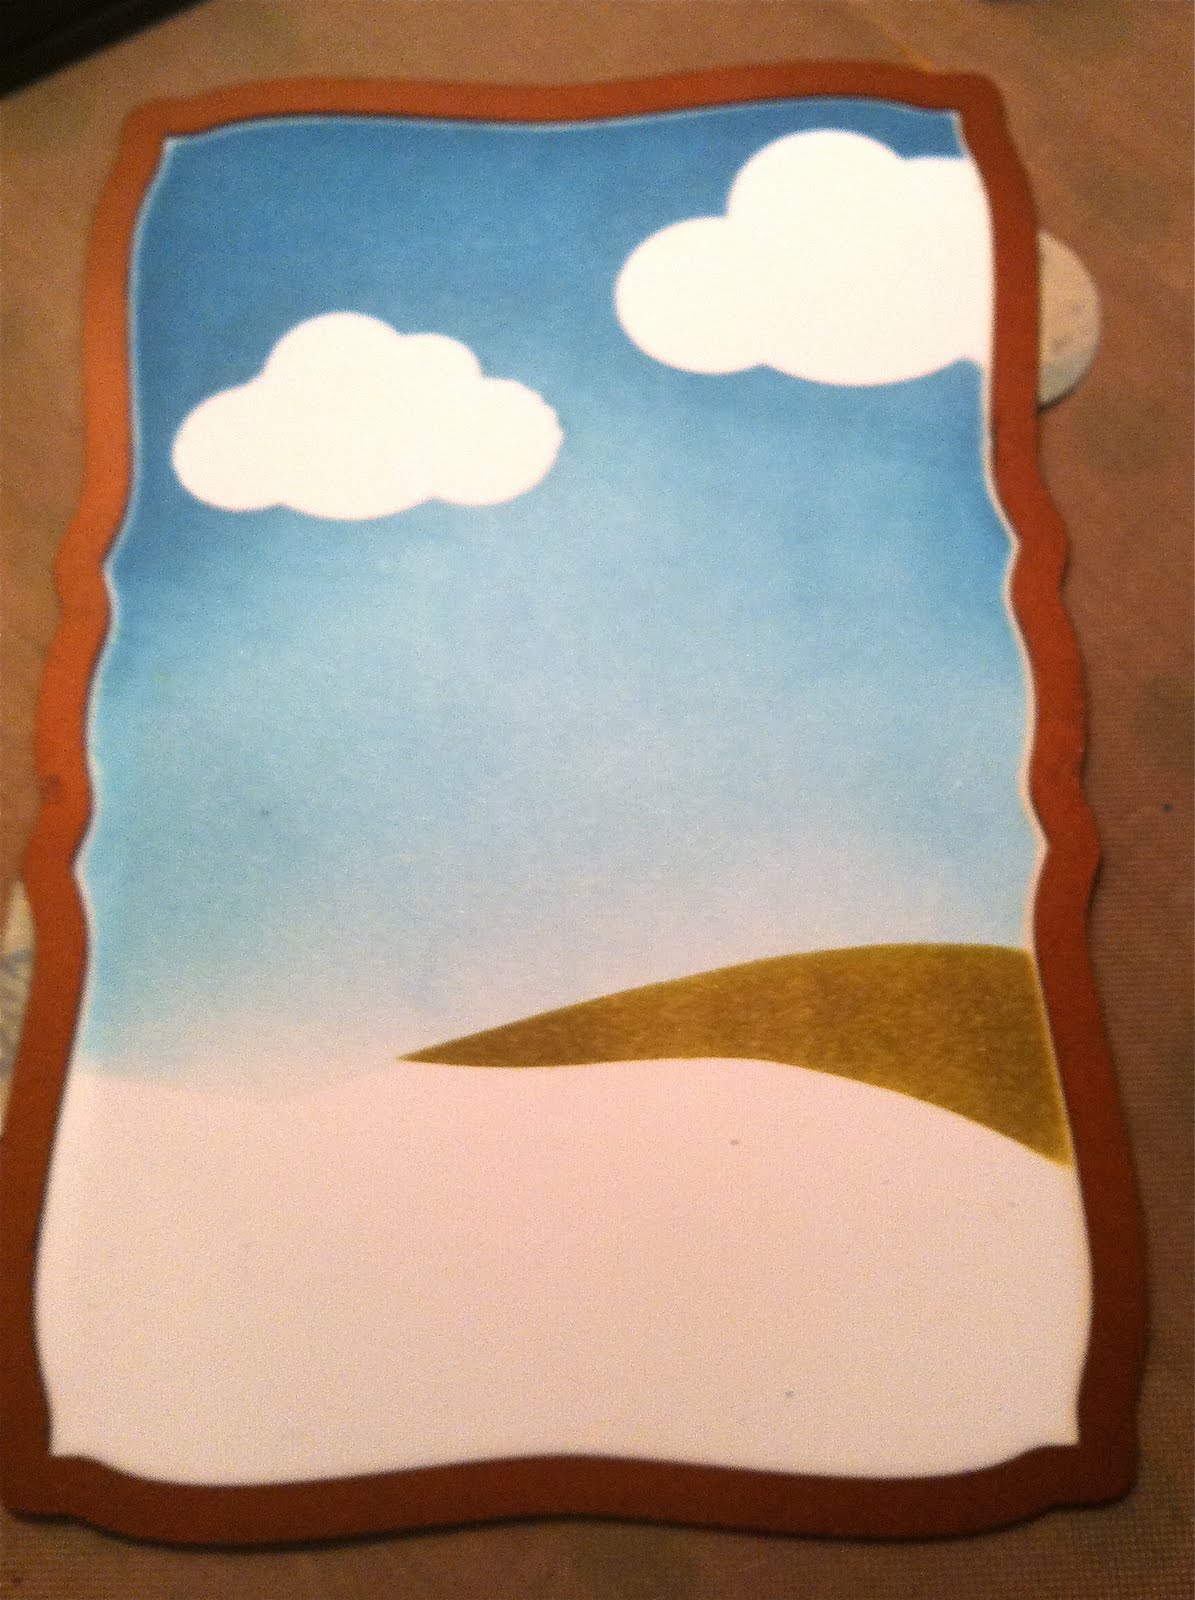
Punch your clouds. Sketch two lines on the on the bottom of the scrap paper that resemble a hill and cut them out. This will leave you with three pieces of scrap and two clouds.

Tape the hills down on the sides of the scrap paper. Use removable tape on the clouds. Once all the pieces are secure layer your distress inks starting with the lightest first.
In this post I describe in detail how to layer the distress inks as I did above.
(Tumbled Glass & Broken China)

Place the top part of the scrap paper over the distressed areas and remove the first part of the hill. A dauber is easy to apply the Crushed Olive in these small spaces.
Gently add your ink a few times to get the desired color.

Try to add more of the ink on the edges. When the outsides of card are darker you eyes tend to focus to the center of the card.
Here’s a peek. One more hill to go.
Put your papers back on to protect what you have already distressed.

Depending on how you cover up the first hill can give you a different result. I left a tiny line of white before covering up the first hill. When finished it will resemble a path.
Distress the second hill with Peeled Paint.

This is the finished result. Now you can add any image to the background.
Load your rubber stamp with Tombow watercolor markers. All you need to do is color the rubber as you would on paper.
Huff into the rubber when you are finished and stamp onto your background & set aside.
Mist your the rubber a second time to get one more card. You will see mine at the bottom of this post.

I used some scrap plastic and scribbled down some colors. If you would like add more color to your image use a blender pen to pick up the color from the plastic (or a paint brush).
This post will describe the technique a with a little more detail.
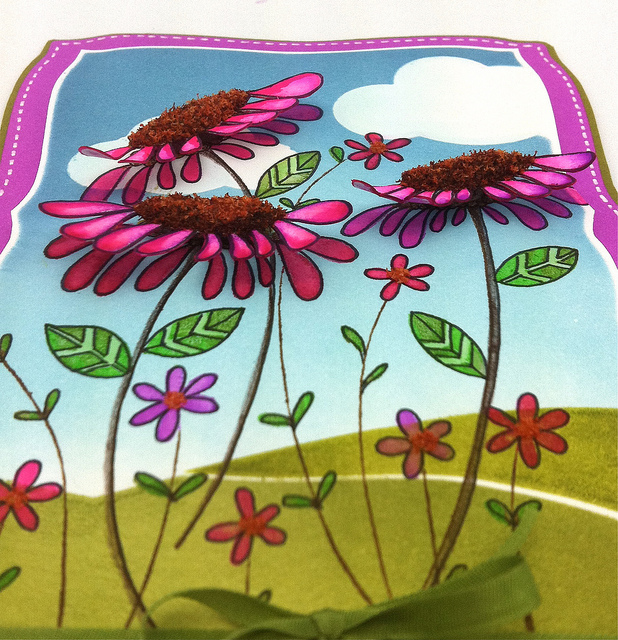
The first image is from the first stamping and the other one is from the second stamping.


A few more details that I added are: I thickened the stems on the large flowers with a colored pencil.
I Added some highlights with a colored pencil to the hills.
I traced the petals and leave with a ultra fine tip black marker.
Applied ultra find flower soft to the centers on the left. First I put down some Glossy Accents & sprinkled with a mix of the two colors.
Add some faux stitching and or dots to the petals.
The card on the right I added Enamel Accents to the center along with Glossy Accents.
Here’s the bonus card from the second stamping.
Thank you for reading this all the way to the end. Tomorrow I have some inking for you with more flowers. As always I am happy you came by. Hugs, Kathy
SUPPLIES: just click on the photos for more details.
|
|
|
|
|
|
|
|
|
|
|
|
|
|
|
|
|
|
|
|
|
|
|
|
 Layering Stamps, video & giveaway
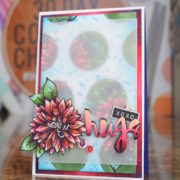 Day 1. The 30 Day Coloring Challenge
 Day 3. Skip Around on Your Paper


Very beautiful card! Love this technique)) LOve the second row of flowers on the card! This looks great!!
Congrats to the winner.
Wow what a great card you made. What a work but the result is gorgeous!!
Hugs Ageeth xx
What an outstanding result Kathy – LOVE it! YOU ROCK!!!
Wow , Kathy the flowers look lovely,love the tip and the details on the card.
You thank us for reading ’til the end??? I THANK You for sharing with us how you did this! Wow Kathy, this is awesome, love this card, it’s beautiful, now I must hop over to the other links… and I really must get me some of these distress inks, they sure do make wonders xxx
WOW Kathy…. this is STUNNING!!!!!!!!!!! I can’t believe how wonderful this is. You are so inspiring… Love what you did.
WOWZERS!! Kathy you have made these flowers literally come to life…stunning and thanks for sharing how you created this masterpiece..congrats to Christy…hugs!
Those cards are lovely.
Marie-Anne
So beautiful and love the tutorial thank you.
Hugs Ali x
Simply amazing… you are just a genius with colour. love what you created – two masterpieces. Hugs, Deirdre
Stunning cards Kathy. Love the bright colors and this flowers stamp along with the Mimi stamp is in my wish list now:)
Thanks for sharing this wonderful tutorial.
Beautiful , I am definitely going to give this technique ago this week. I’m all up for trying new things at the moment. Thanks for sharing,
thanks for the tutoral, always nice to see how something has been made!
Gorgeous results, Kathy! LOVE both of these masterpieces!
That is a gorgeous card, and a great tutorial! Thank you for sharing. 🙂
Ditto on EVERYTHING already said! Stunning cards and great tutorial!! Lots of work, but oh, the masterpieces! Outstanding!
Stunning, Kathy! I wished I could master half of your coloring skill!
Oh my word! The depth you’ve achieved is absolutely amazing, Kathy! What a GORGEOUS CARD!!!!
Love the bright colors!
Two stunning creations, a beautiful second card. Love the idea and the two stamps. But can not afford any more! Although I am very tempted and you have creaated some beautiful cards.
Double Wow Kathy.
I am a new follower and I love the technique of this card as well as the vibrant colors…beautiful! Thanks for sharing your talent!
Oh this is beautiful! I love the dimension and your use of flower soft. Thank you so much for the tutorial, I am bookmarking and can’t wait to try it! 😀
So pretty Kathy…I just love your bold cards and white dot accents….great tute!
Wow oh wow Happy Monday to us readers! 🙂 These cards are AMAZING and thank you so much for the tutorials! BEAUTIFUL WORK. 🙂
this is INCREDIBLE, Kathy! Absolutely incredible! LOVE your cards, my friend! xo
Wow Kathy – this is AMAZING. your masking is just perfect… I am in AWE.
Kathy these are amazing! I love to see the different approaches you have to the same stamp
Just amazing!!!! Jo x
Such a gorgeous card Kathy! I love how you built up the scene 😉
Thanks for your inspiration, hugs, Ruth S
Amazing! Both cards are so pretty and I am speechless with what you did on the first card! Thank you so much for sharing this tutorial with us!!
I love the two different looks you created & especially the little path on the first example. I’d not thought to outline my images with black except for when layering to prevent the white edges showing but I can see what I difference the outlining makes to the stamped image itself.
Paula (PEP)
Beautiful Sista, as always!
what a beautiful coloring & beautiful scene! Looks like Early Summer which makes me smile even more! 🙂
stunning colours, these flowers are amazing!
These are so my colors, perfectly beautiful design!
Beautiful cards Kathy! My first thought was, ‘How did she do that, isn’t that a solid stamp’!? Even as I was reading through the tutorial I did not realize how you did it immediately…oh yeah, she used tombo markers…oooohh, she traced the outlines with a black marker. Maybe I am just having a slow night! I love the colors you used. And I love seeing your two variations, very cool! Thank you for the tutorial!
Katie
WHAT an amazing tutorial!!! Everything you touch turns into a rainbow of gorgeousness!
Amazing looking! Love the dimension on the flowers and you KNOW I love how you did those hills. Fabo!
I love your card and tutorial. This stamp is a must have!!
Your work is absolutely breathtaking! I don’t know how anyone could ever do any better.. LOVE this!
GRAET CARD. WONDERFULL
I’d love to know what brand’kind of white cardstock do you use.
If you have a link that would be super since I would love to by some 🙂
Thanks
great tutorial, I have been wanting to try these inks for a while now. so glad I discovered your site x